This is an old revision of the document!
Table of Contents
Creating and running a book club
Creating a new club
To get started, simply use the “Create book club” link in the “My book clubs” box on your Connections profile. Enter a title and description for your club (you can change these later):

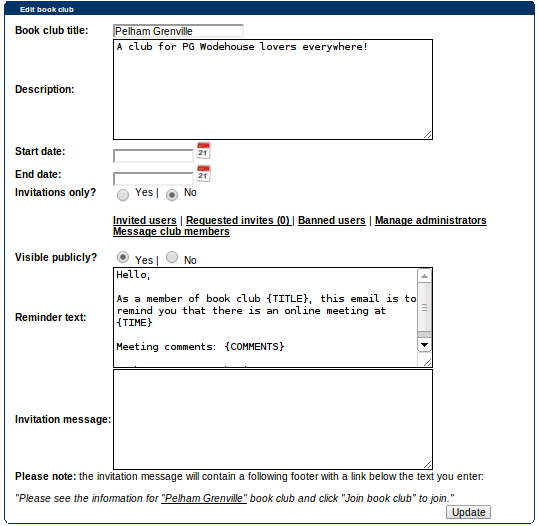
Once you've entered these, you'll be taken to the “edit settings” screen where you can choose the main setup for your book club:
- Start and end dates for the club (not essential, but you might want to run it over a semester/year/season, or through a reading challenge, for example)
- Access settings: by default a club is open to all, but you can set it to “invitations only” if you want to manage membership. (See more info on membership below.)
- Visible publicly? This means the book club will show to all users when they choose “list all book clubs”. You may want your club to be hidden if it is for a closed group of people.
- Reminder text: this is the text sent out to users to alert them to an upcoming meeting. You can change the text here, and see more info on managing meetings later.
- Invitation text: when you invite users, they're sent a message in Connections; you can add custom text to this message here (it automatically ends with a line including a link through to the club).
Click “update” when you're done. To return to this page at any time, just visit your book club and click the “edit settings” button.
Managing book club members
If you choose to leave your book club open, anyone will be able to join it simply by visiting the club and clicking the “Join book club” button.
If you choose to set your club to “invitations only”, you will have to invite users to become a member. Within the “Edit settings” page there is an “invited users” link, which will show you all invited users (and whether or not they have accepted the invite) and where you can also search for more users to invite.
If your book club is visible publicly, a user might still see it in the book club list and request an invite if they're interested in joining. You will receive a message to alert you, and again within the “Edit settings” page, you'll see a “Requested invites” link (showing the number of requests in brackets) where you can accept or reject the request.
When a user joins a book club you have created, you will receive a message within Connections telling you who has joined.
One other action you can take is to ban users - if they are leaving offensive comments, for example. You can view a list of banned users, and ban further users, in the “Edit settings” page with the “Banned users” link.
Adding items
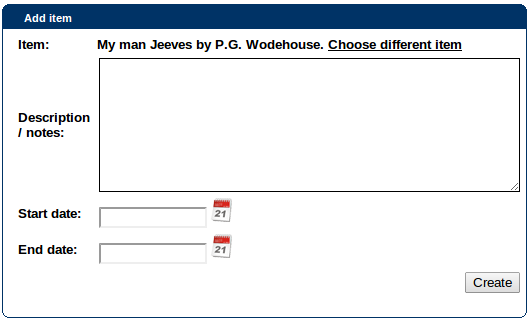
On the “Edit settings” page you will also see a box underneath allowing you to add a new item:

This takes you to an item search screen where you can look up the item you'd like, and then you should click the “Add this item” icon on the right ( ).
).
Finally, you should add some further information: a description, and start/end dates for this particular item. (Or you can leave these blank and fill them in later as required.)
You can add multiple items to the club and set dates for the order they should be read. The current item (according to the dates you've set, or the latest item added if there are no dates) is the one displayed in detail on the book club page.
After adding an item to the club, you are taken to a page where you can add meetings…
Managing meetings
Once you've added an item, you can set up a meeting for members to discuss it. This is a virtual meeting which is effectively an online chat room open specifically for this meeting at this time. (The transcript will be viewable afterwards, though.)
You can set up a meeting from the “Edit settings” page (using the 'edit' link by the item in the list) or if it's the current item, you'll see an “add” icon by the meeting list.
Here you can make any edits necessary to the item, and fill in the details on the right for your new meeting, including choosing reminder frequency:
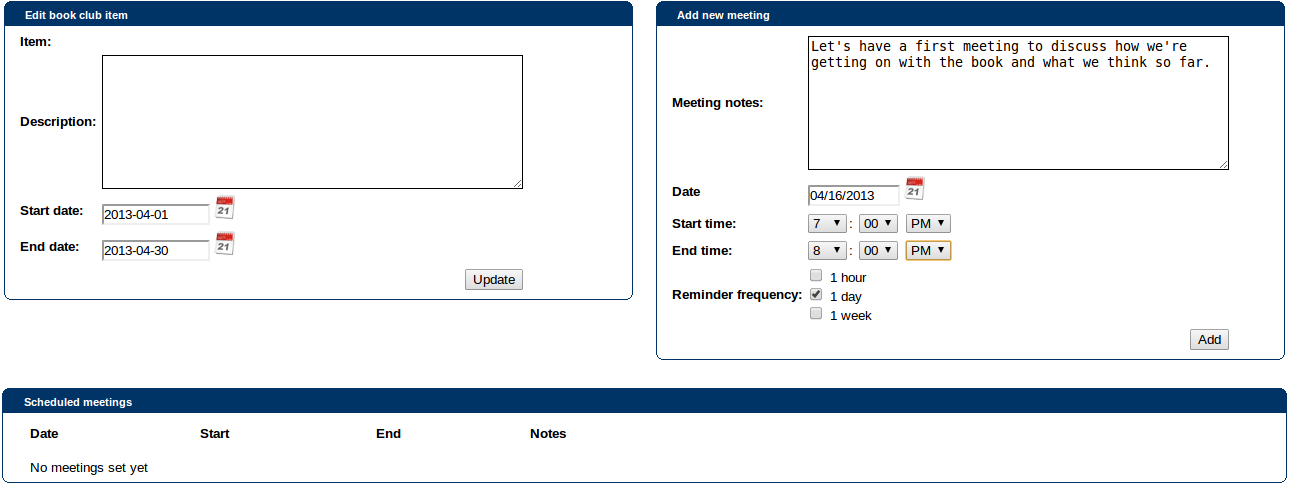
Once you click 'add', you'll see it in the list of scheduled meetings for that item at the bottom.
Your book club members will receive a reminder in their Connections messages according to the frequency you set.
Discussion threads
A final aspect of book clubs to mention is discussion threads. By default, there is one created automatically with each new club, called “Welcome to the book club!” You might want to ask users to introduce themselves here, or suggest new reads.
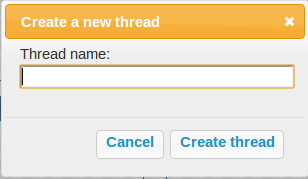
You can create a new thread using the 'add' icon by the discussion threads list, and entering a thread title in the pop-up box:
You're then taken to the thread itself so you can add a first message. Members of the book club will receive a message alerting them to a new thread, and also in their “My following” box, they will see updates when comments are posted in their book club discussions.