Table of Contents
Managing items and bookshelves
Managing bookshelves
In the My Bookshelf section of your profile, you'll see the three default bookshelf options: My current reads, My library, My wishlist, as well as an “All shelves” option for viewing all items on any of your bookshelves all in one list. In addition to the default bookshelf options, you can also create additional personal bookshelves.
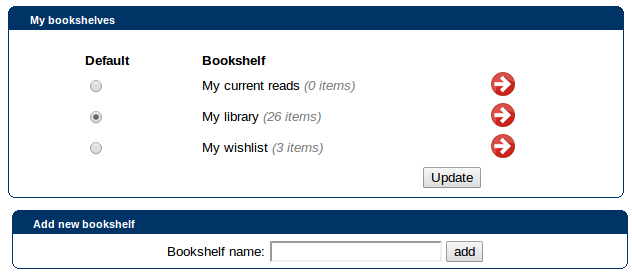
Click the “Manage bookshelves” link under your bookshelf image to see all your bookshelves:
It displays the names of each bookshelf, the number of items on each shelf, and which one is the default. This means that it is the bookshelf that displays on your Connections home page (although the others are still available in the drop-down); and that when you view an item in Connections and choose “add to my bookshelf”, it adds it to your default bookshelf (but it can be moved). To change the default, select the bookshelf required and click 'update'.
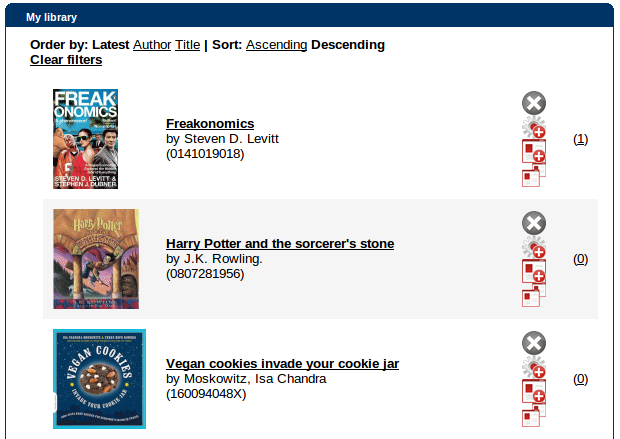
If you click the red arrow to the right of a bookshelf, you'll see all of its items in list form:
By each item you can:
- (1)Click the number in brackets to see the other users who have this item
Adding bookshelves
Having clicked the “Manage bookshelves” link under your bookshelf image (or in the My Bookshelves box on your Connections home page), you can see and manage all your bookshelves as described above, but you will also see an option at the bottom to create a new bookshelf:
Simply type the name required for your new bookshelf and click “Add”. That's it!
Editing and deleting bookshelves
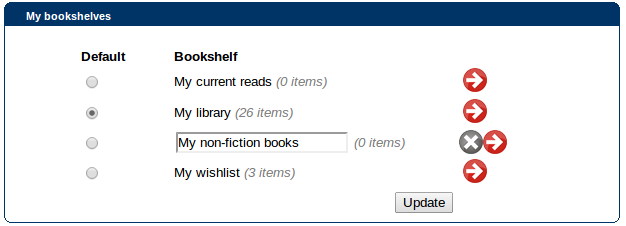
The three default bookshelves (My current reads, My library, My wishlist) cannot be renamed or deleted but any bookshelves you have created yourself can be. They appear with extra options in the “Manage bookshelves” page (click the link from your My Bookshelf box on your home page):
To rename a bookshelf, retype the name as desired and click 'update'. To delete a bookshelf, use the 'remove' icon to its right ![]() .
.
Adding an item in Connections to a bookshelf
If you are already in “Manage bookshelves”, you can click the arrow by the relevant bookshelf to see all items on the shelf. You'll also see a search tool which you can use to search for an item and then add it to that bookshelf.
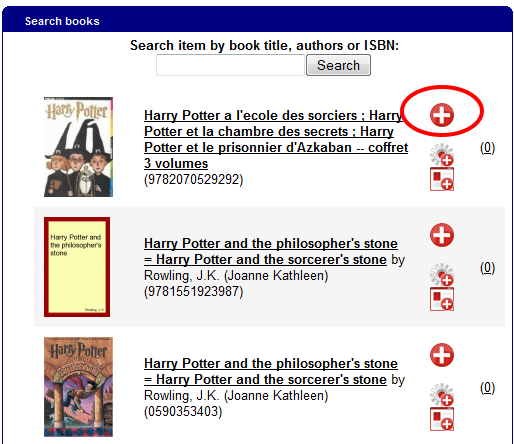
If you're not in “Manage bookshelves”, you can just use the search tool in the top bar of Connections, choosing 'books' from the drop-down of what to search.
In either case - or indeed at any place in Connections where you are looking at an item - once you've identified the relevant item, just click the “add to bookshelf” icon and it will be added to your bookshelf. The icon will change to a green tick to show that it's been successful.
Adding an item not in Connections to a bookshelf
If you want to add an item to one of your bookshelves but can't find it in Connections, you can add it manually.
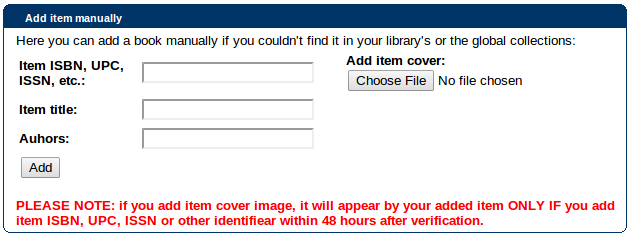
Use the “Manage bookshelves” link on your Connections home page and click the arrow by the relevant bookshelf to choose that list. Then you'll see an “Add item manually” button which you can click to get a short form to fill in:
Just enter the details you know and click 'add'.
Removing an item from a bookshelf
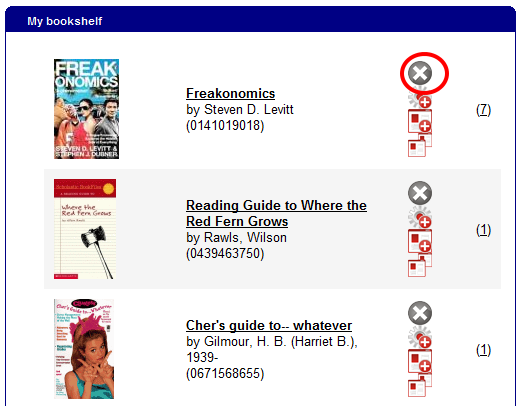
First, go to that bookshelf, by choosing “Manage bookshelves” from the My Bookshelf box on your Connections home page, and clicking the arrow by the relevant bookshelf. Then find the item you wish to remove - either by browsing the list, or using the search box at the top to help - and click the “Remove item from bookshelf” icon to the right of it.
Importing items to a bookshelf
If you have a list of books in another system that you want to use in Connections too (for example Good Reads, Shelfari, or LibraryThing), you can simply import them to Connections - no need to add them one by one.
Use the “Manage bookshelves” link on your Connections home page and click the arrow by the relevant bookshelf to choose that list. Then you'll see an “Import items” button - click this and you'll see on-screen instructions.
First, you need to export your items from the other site. You'll need to follow their instructions to do this but it should be straightforward (for example in GoodReads there's an “export to a csv file” option in the 'My Books' page, and LibraryThing similarly has a 'more' tab containing import/export options).
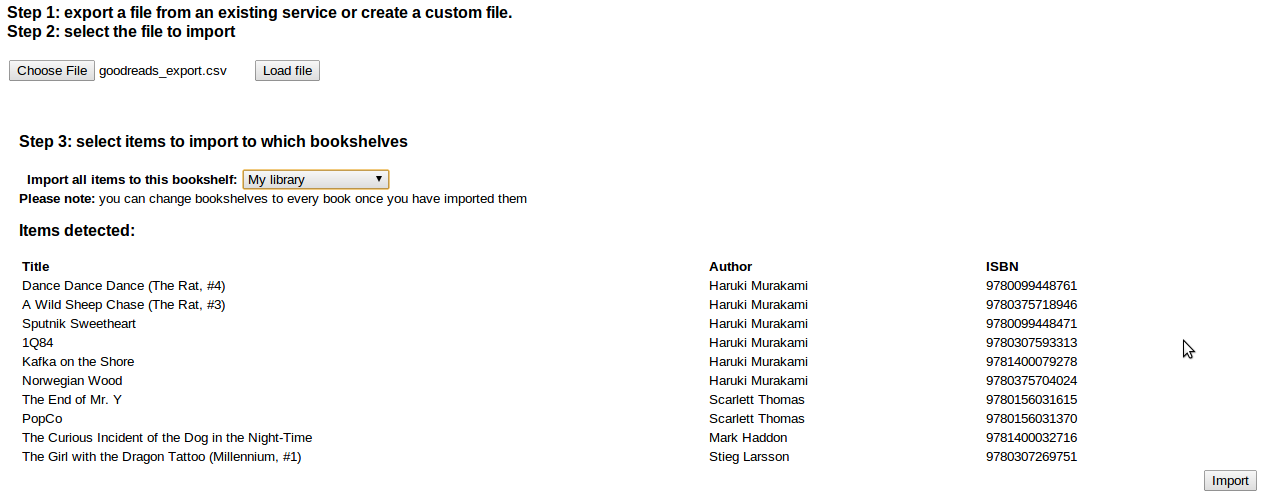
Then, at the Import Items screen in Connections, use the 'choose file' button to navigate to your csv file on your computer, and once you've found it, click the 'load file' button. Connections will then read the file and report back on all the items it's found:
If this looks good, choose the bookshelf you want them loaded into, and click the 'import' button in the bottom right. Once the processing is complete, you should see the message “Imported items added to your bookshelf!” - and that's it done!
Viewing/editing items on your bookshelf
From your bookshelves, you can click through to any item to see more information on it. You'll be taken to the item view screen which is described in more detail on the item view page.
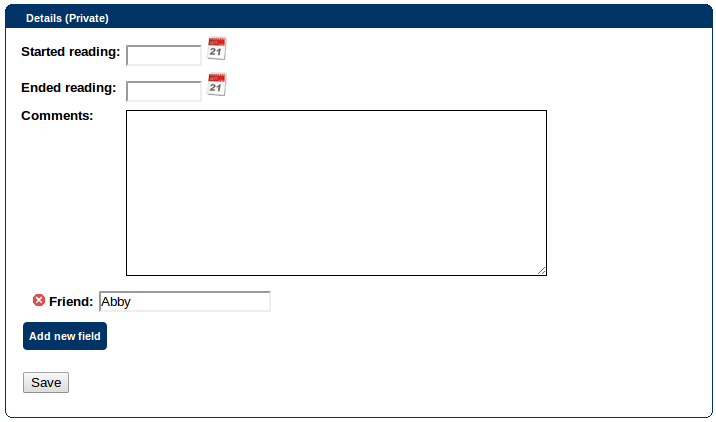
In addition, because the item is on your bookshelf, you'll have an extra box at the bottom of the screen:
This information is private - no-one else can see what you enter here. The default fields are for you to record when you started and finished reading the item, and any comments. However, you can also add your own fields if you like - in the example above, the “Friend” field has been added, maybe for the user to keep track of who the item was borrowed from or lent to!
To add more fields, just click 'add field' then enter the label and the content for that item. Once you've added a field, it will appear in this box for all items on your bookshelf (and if you delete it, you delete it from all items).


